Since July, I have had the chance to take a look at the printer from afar, as it were. Building it from scratch gave me macro-vision. And stepping away from the printer in the last couple of months have helped me identify a few areas of improvement:
- Wobbly Y-Axis.
- Hotend positioning.
- Printing in ABS.
- Auto Bed Leveling (my bane).
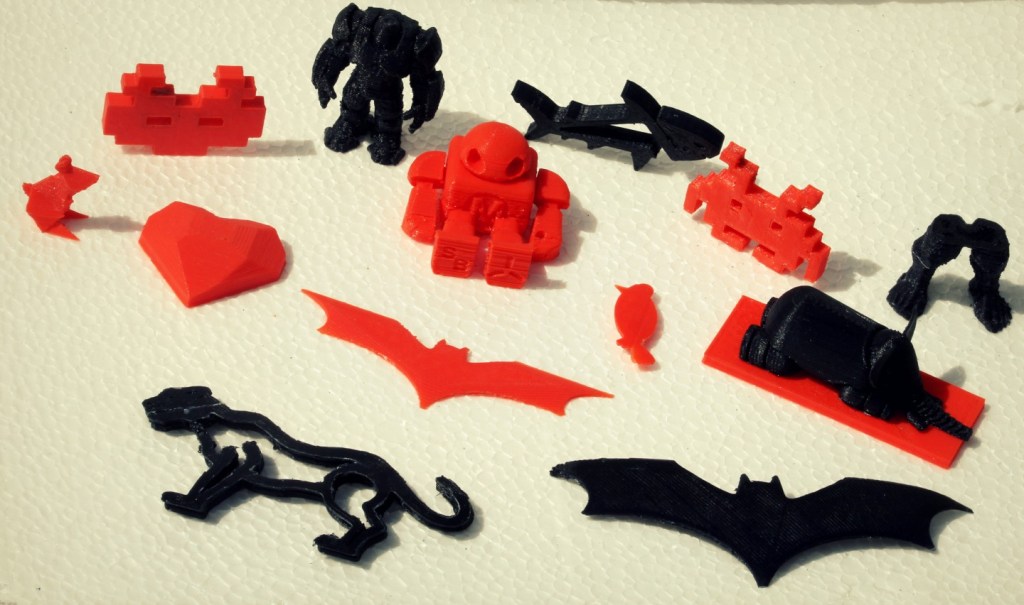
I did a few prints before I identified these issues, and here are the results:


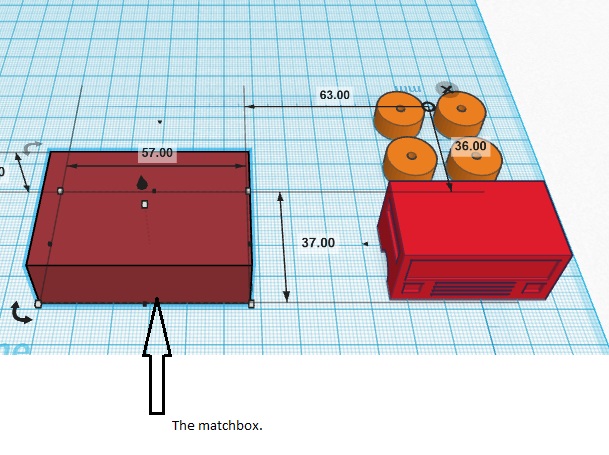
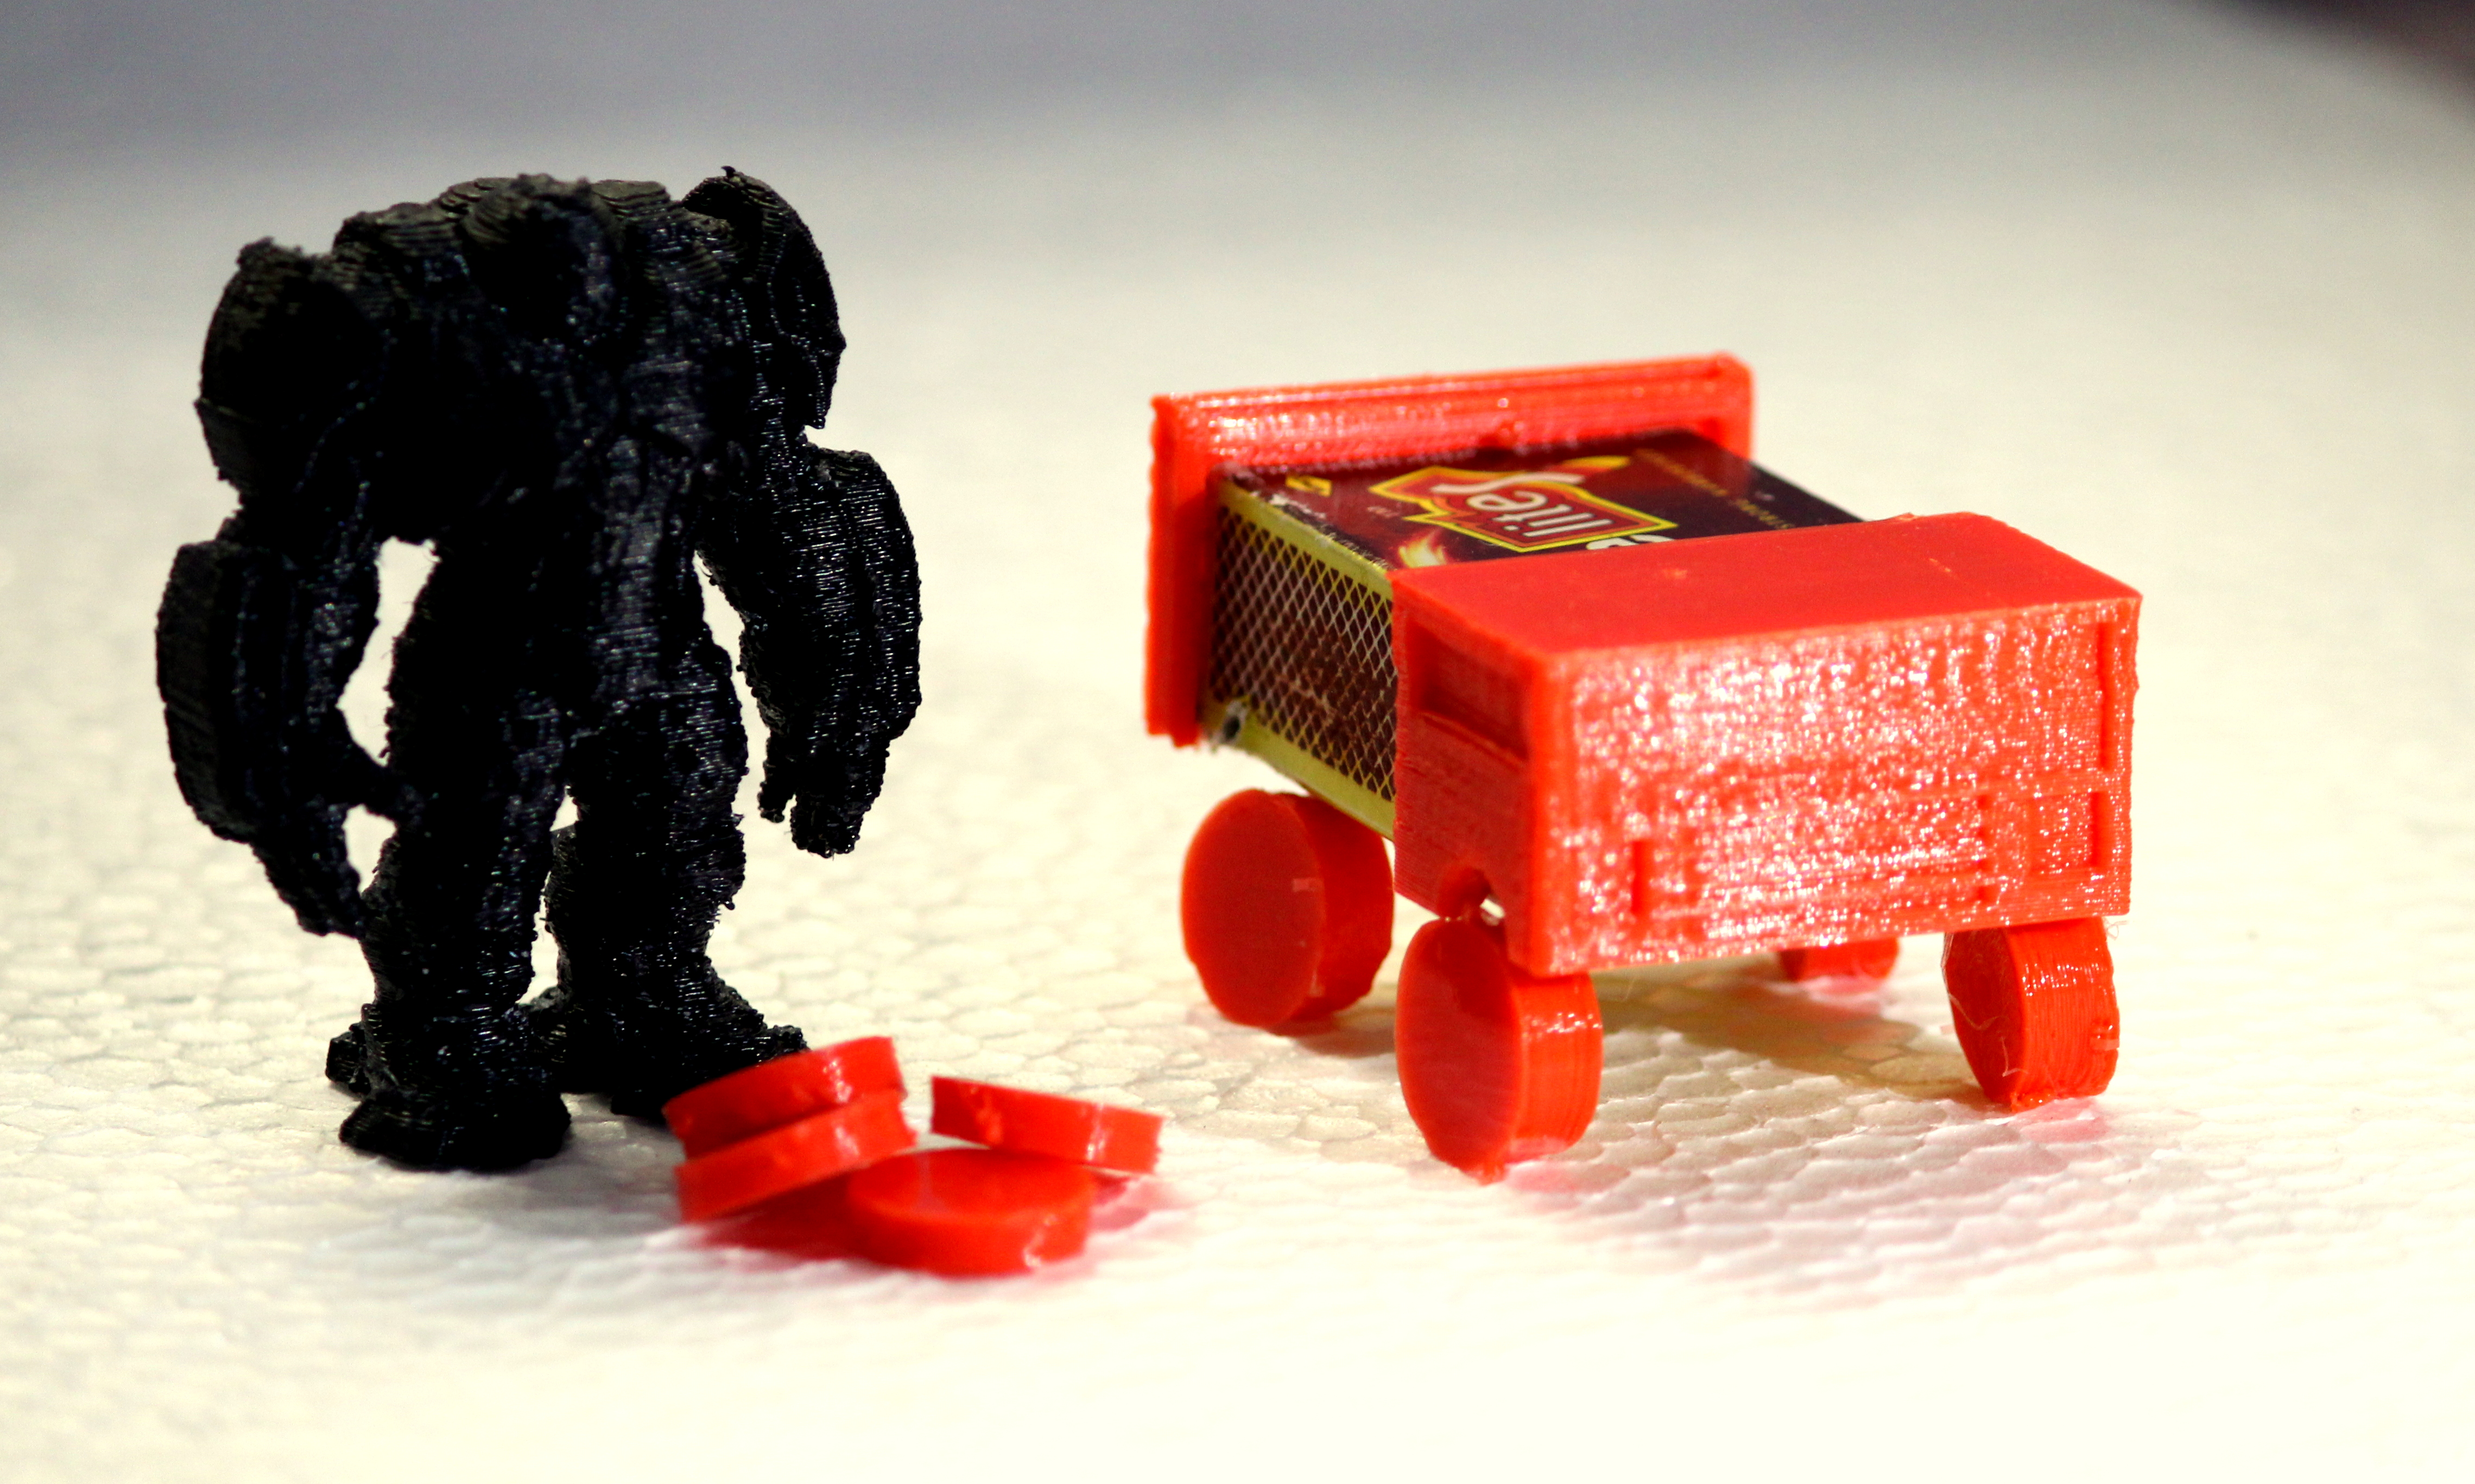
Around this time, I had an idea to use simple, everyday objects commonly found around the house and combine them with 3D printed objects to make really simple and cheap toys. I had a bunch of matchboxes lying around, so I quickly whipped up this truck on TinkerCad:

I quickly printed the truck face and the tires (all at the same time – 5 objects at once), and then had a little fun with them:


After I returned from this digression, I fixed the wobbly Y-axis using simple techniques. Y-axis is wobbly because the print platform (heat bed) is wobbly. And the print platform is wobbly because its resting on four springs with different levels of tension. Theoretically, the four springs should all be tightened to the same tension to achieve an accurately leveled bed. But this wasn’t happening on my printer, and I ended up having to adjust the Z end-stop and the springs continuously to achieve a plane surface.
I fixed this by:
- Eliminating the wobble by tightening the spring down as low as possible,
- Inserting a thin square of thermocole packing cut to match the square of the bed.
This has really, really improved my prints. The Y-axis is stable and strong because of the tension in the spring, and the thermocole serves two purposes – it absorbs stray vibrations and actually heats up the heat bed faster. It also helps in sustaining the heat.
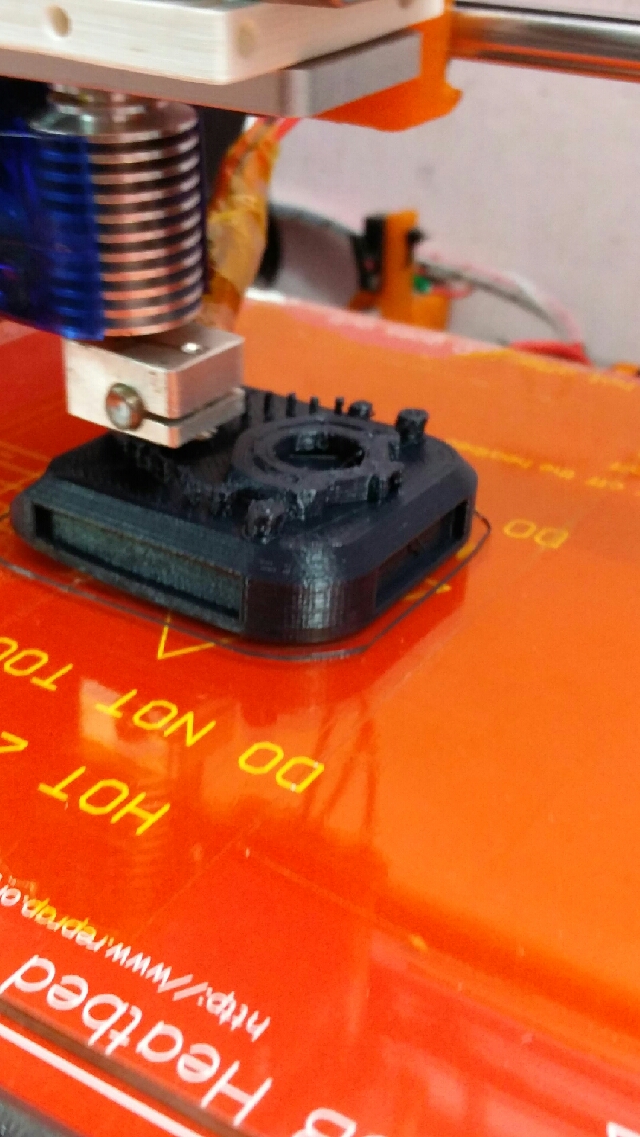
My second problem was hotend positioning. The hotend holder is not exactly compatible with my newly purchased E3D v6 All Metal Hotend. The hotend has a little give when it sits in the holder, which causes is it to move around when the cartridge wire is pulled. Not good. So I cut off a piece of metal thread and tied it around the mouth of the hotend. The thread covered the gap that caused it to move, and now it fits snugly in the holder.
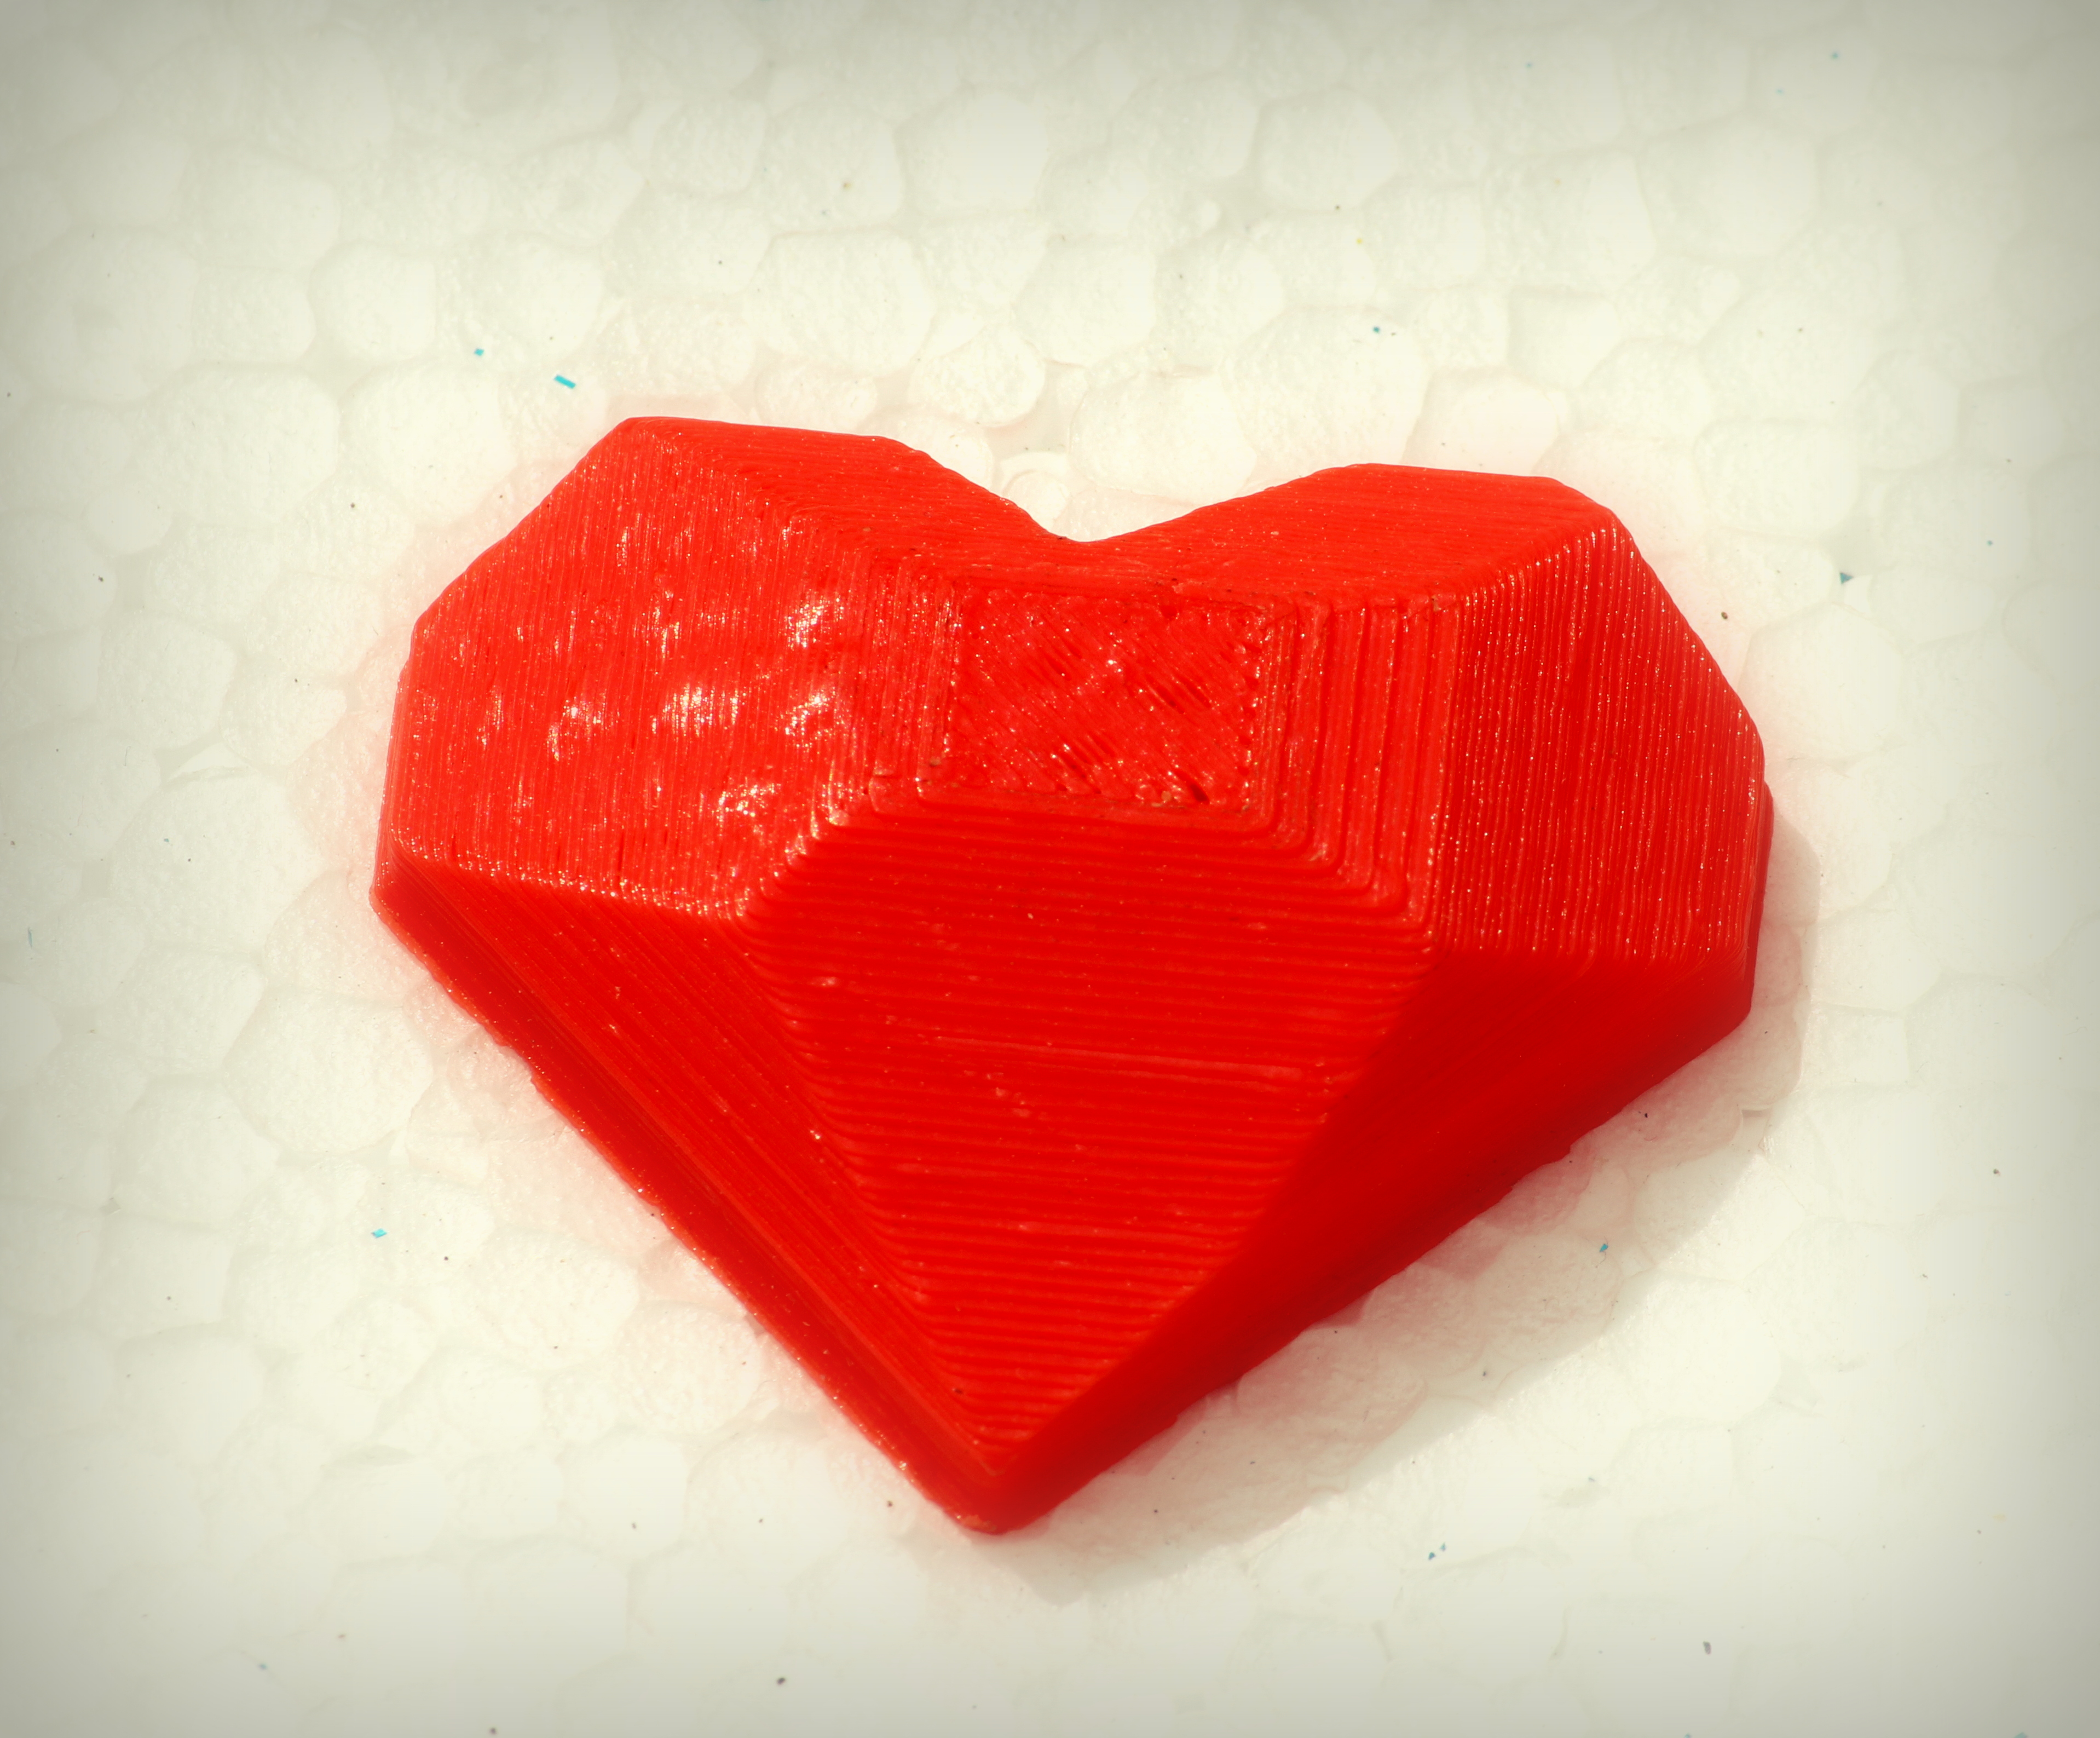
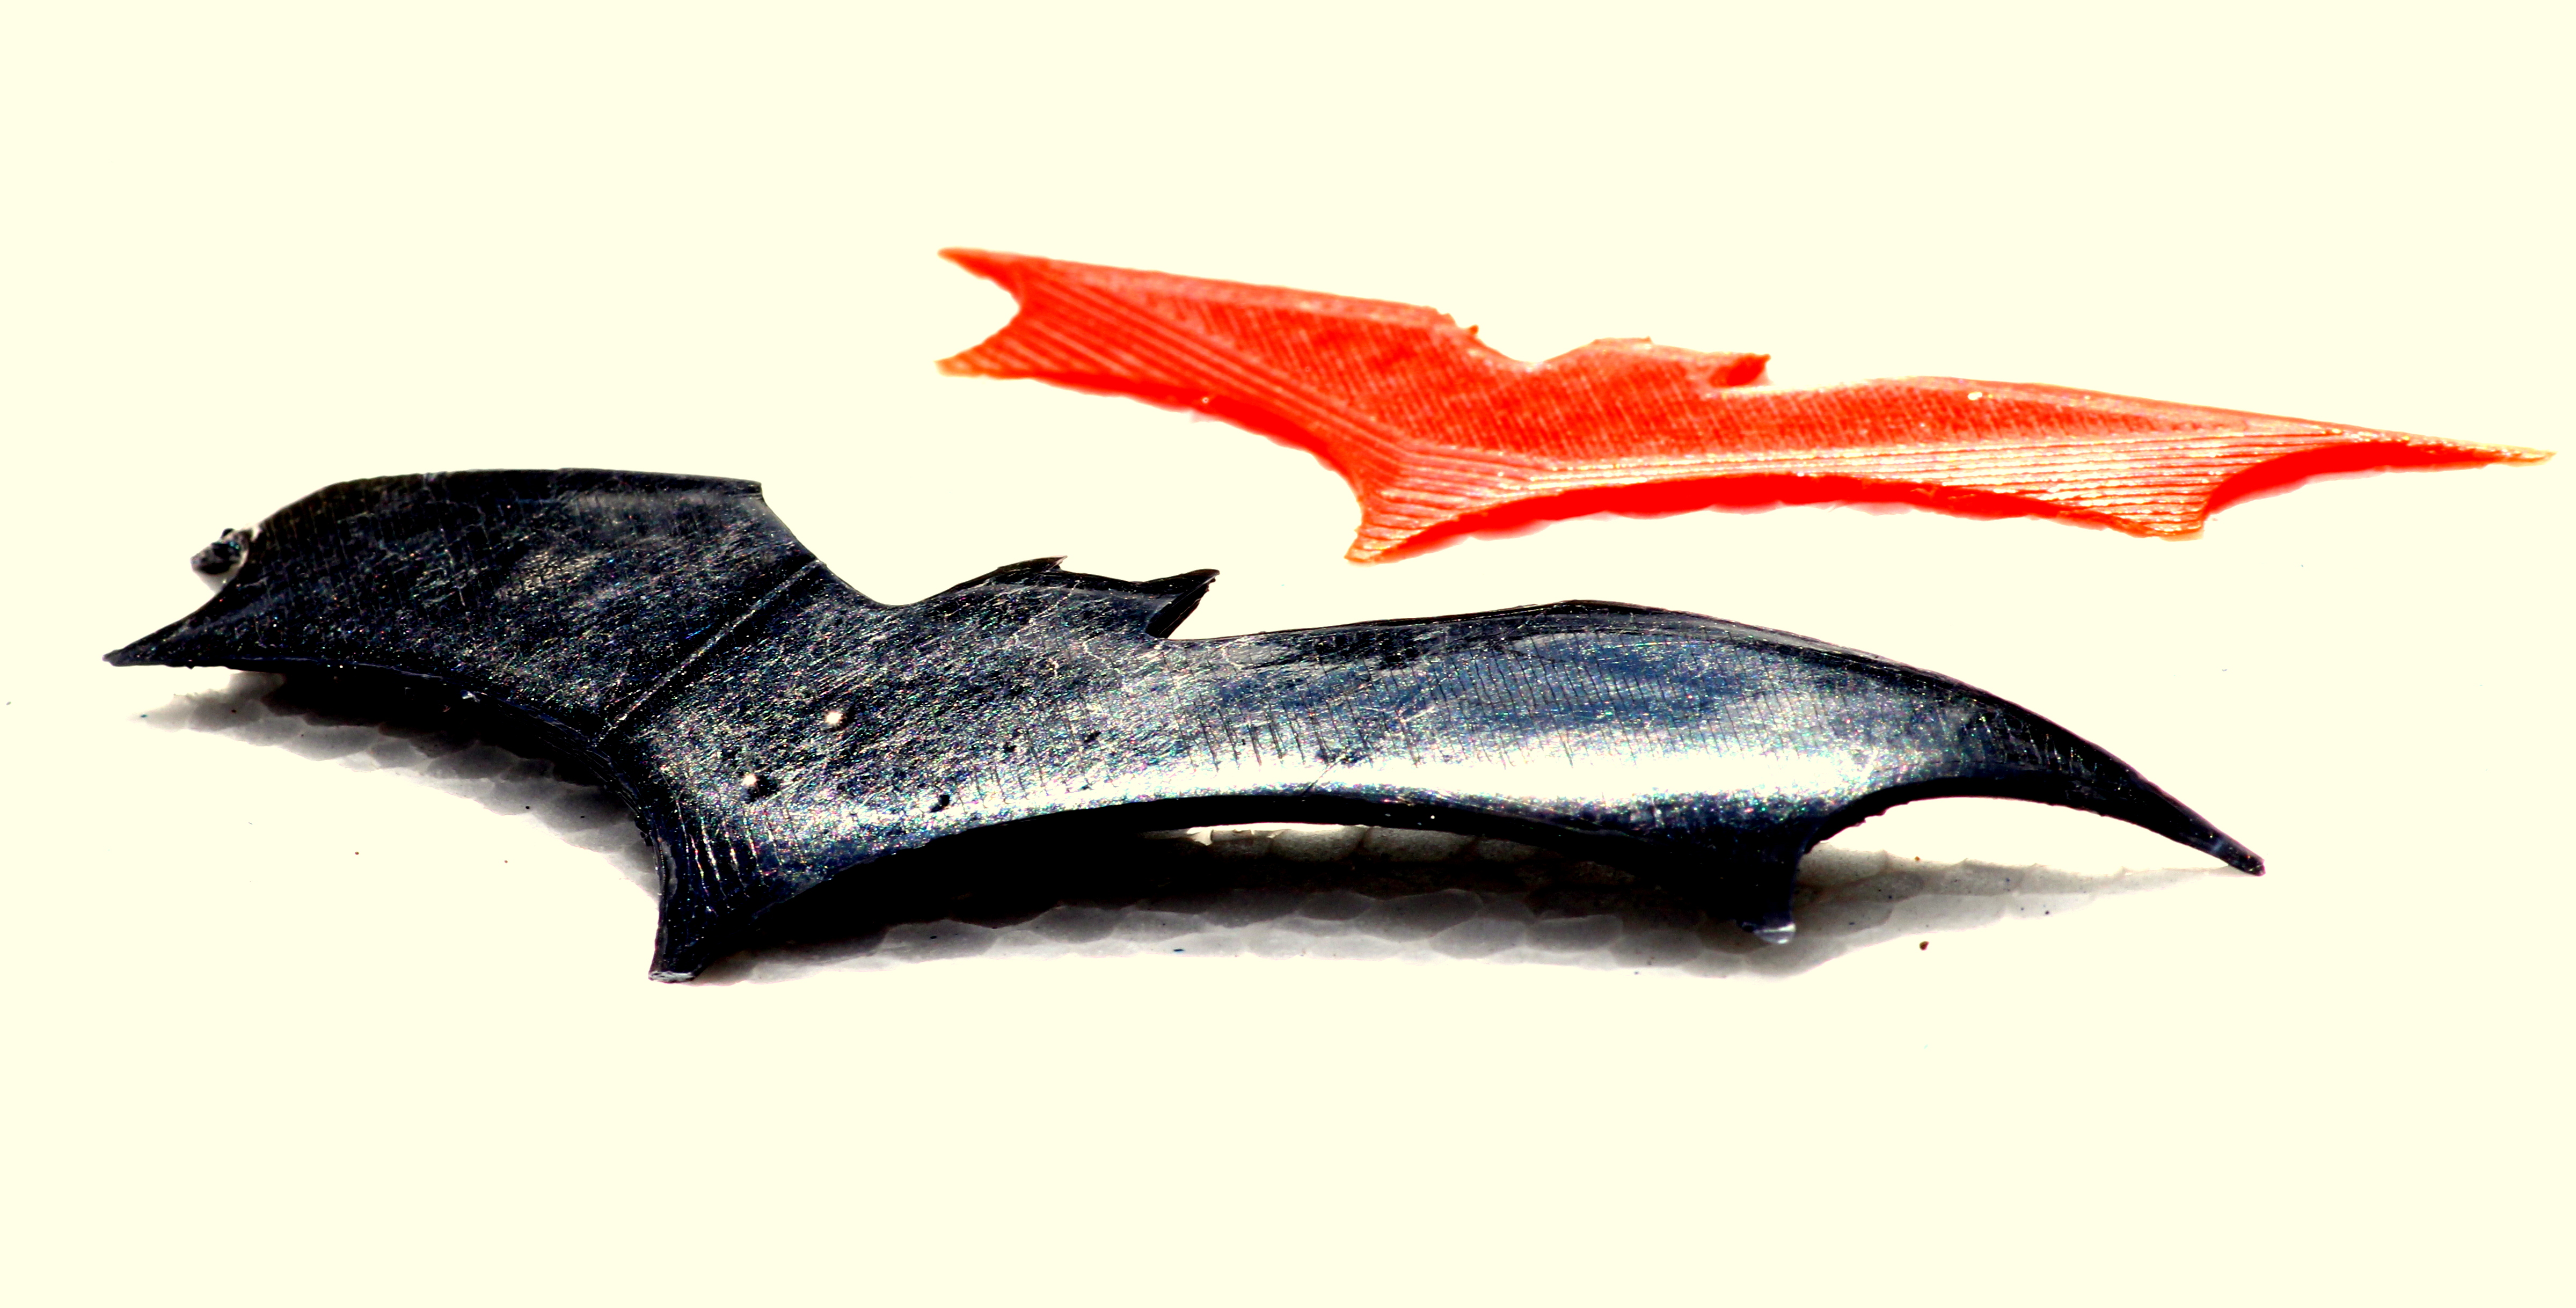
Printing in ABS has been a wild ride. There are so many things that can go wrong. If you don’t have the first layer downright perfect when you’re printing with ABS, then expect the object to curl up into an unrecognizable ball of mess by the end of it. This happened to me the first time, and I was printing a Batarang. It looks like a dead bat now.

There are a few things you could do to avoid the infamous ABS curl:
- Get your first layer right (and to do this you may want to look into Auto Bed Leveling).
- Put down a layer of Kapton Tape on your platform (or a slurry of ABS-Acetone juice).
- Heat up the bed to 100 degrees, at least.
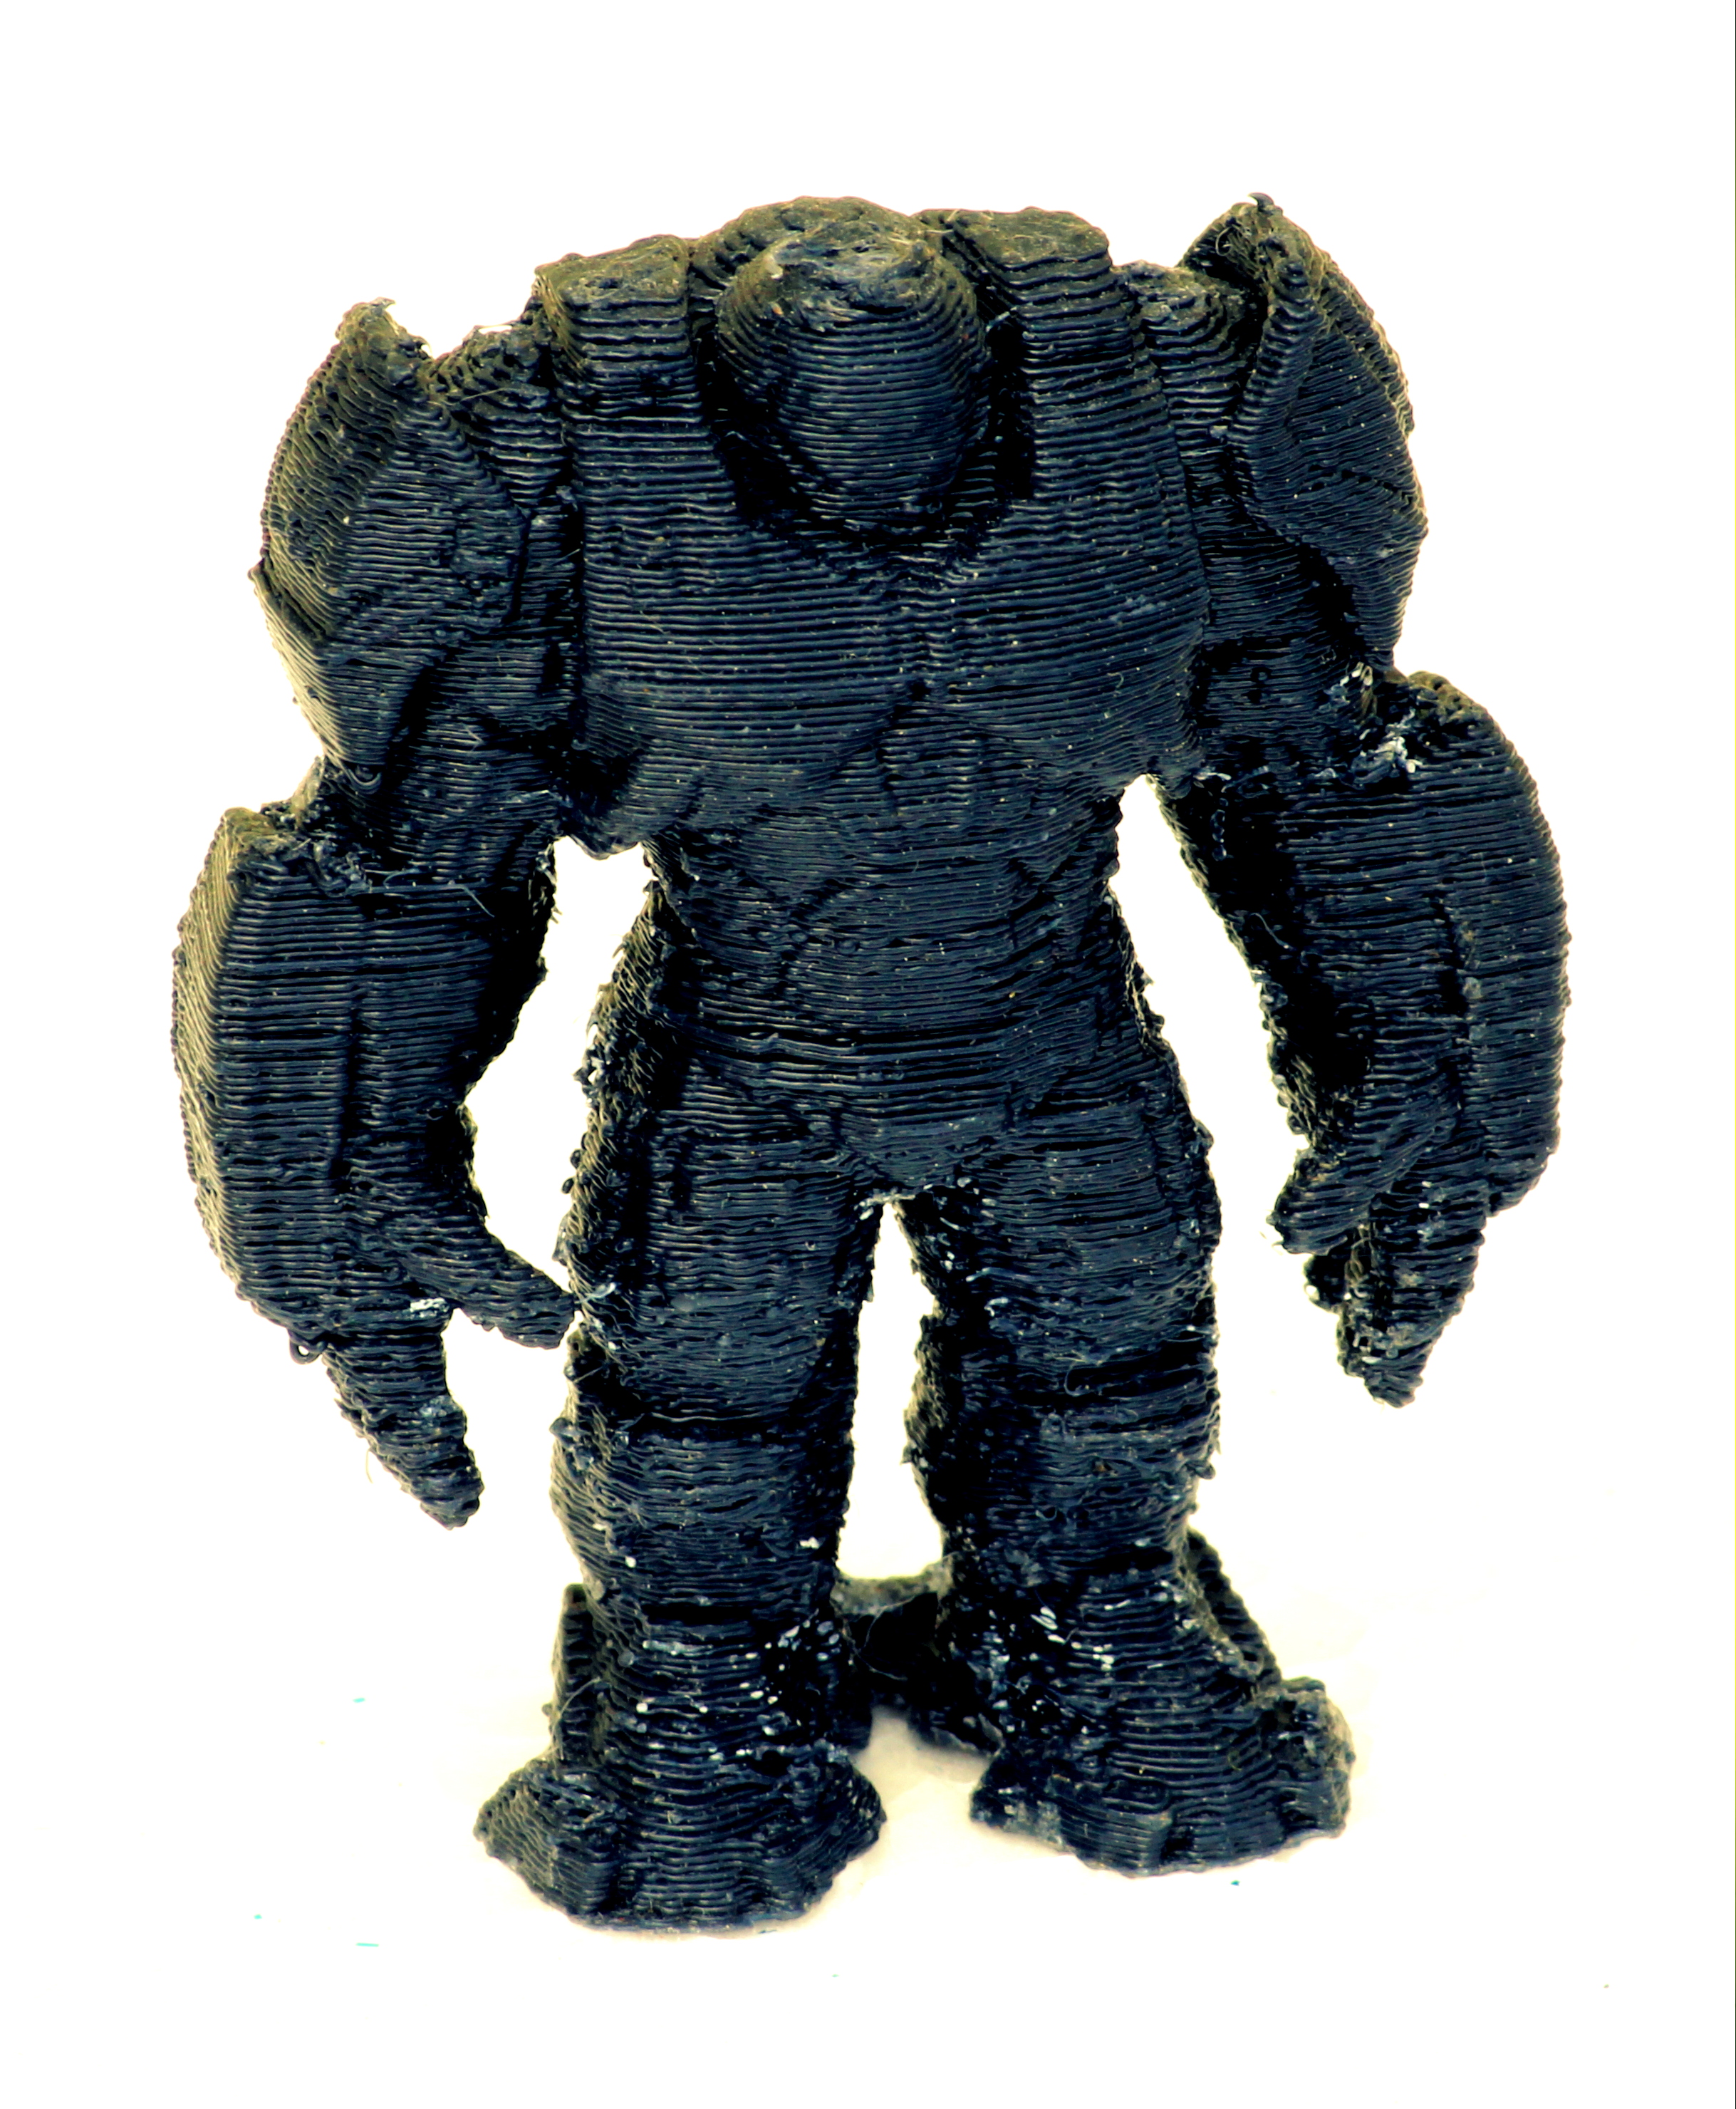
I used Kapton tape on my bed, corrected the plane of my platform, fixed the Y-axis wobble, re-did the X, Y, Z and E calibration, fixed the hotend position, and gave it a whirl. This is the result:
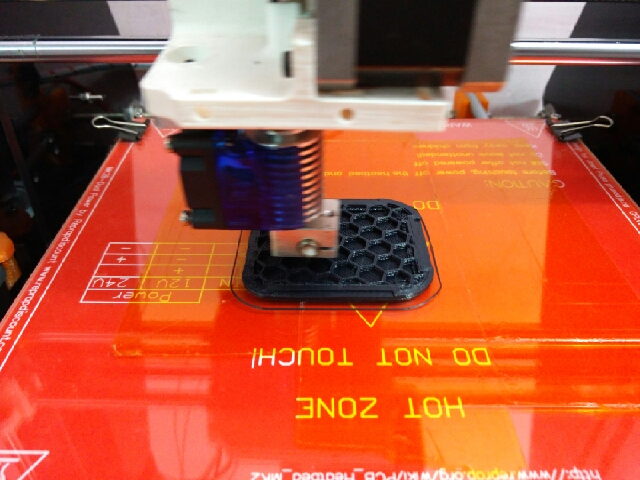

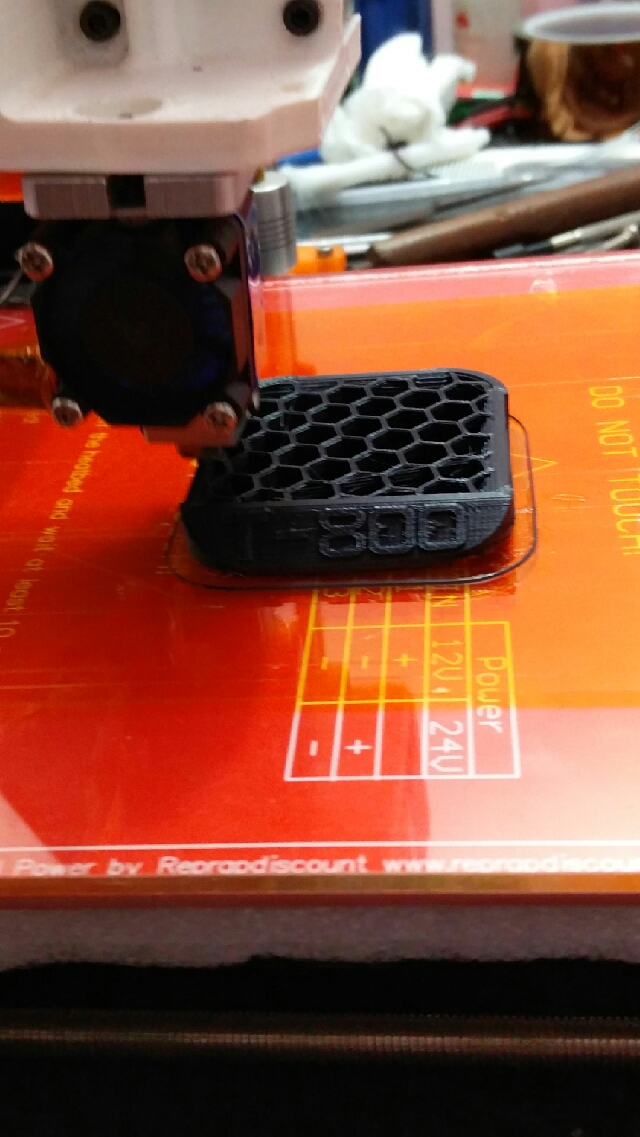


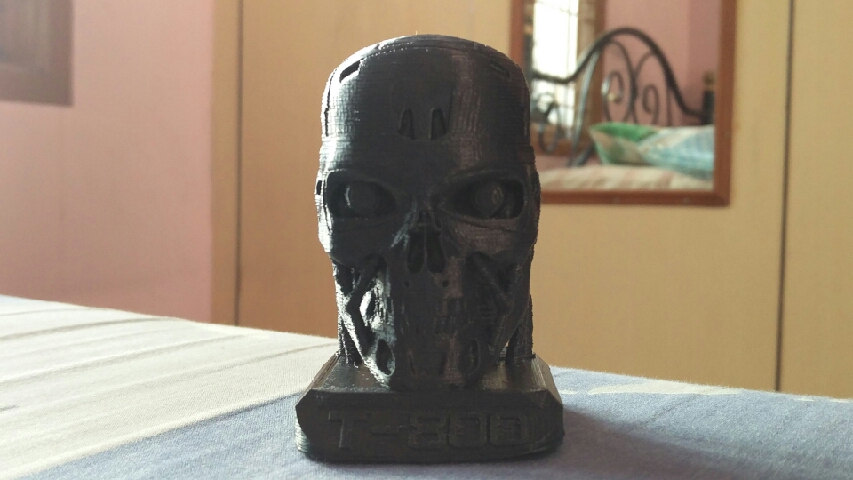
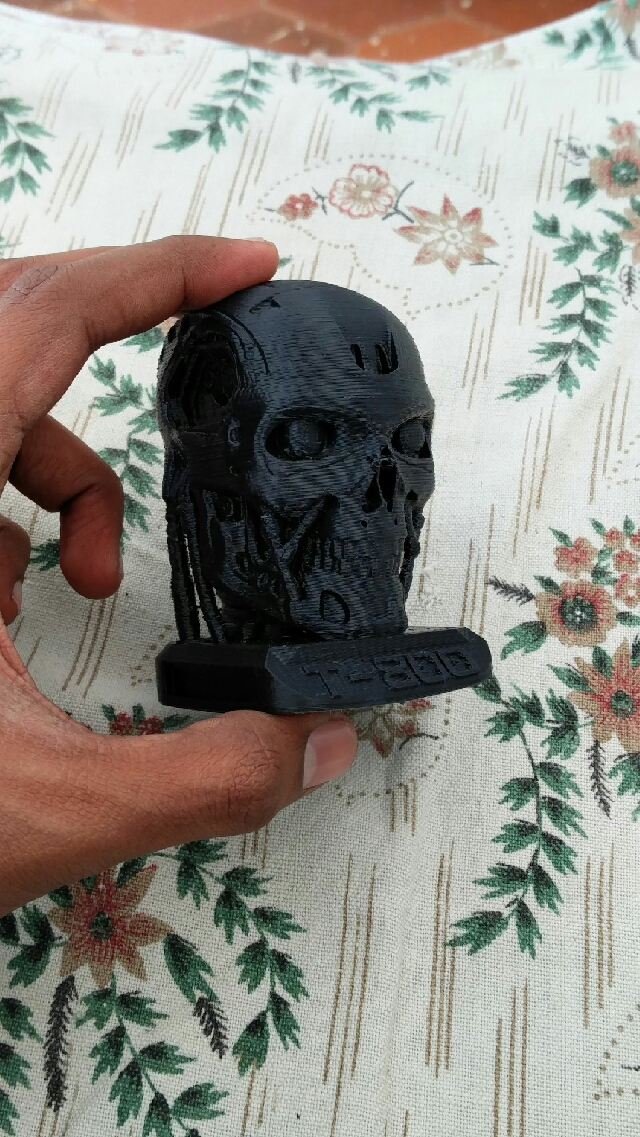
I’m extremely happy with the T-800 print. I printed the whole thing on a super-fine resolution of 0.1 mm and even achieved 0.05 mm (50 microns) on the first layer (accidentally). This accidental reduction of first layer (I made a mistake in the gcode) resolution caused the ABS to curl up from two corners half an hour into the print, but I managed to mitigate this increasing the platform temperature. Also, I was able to leave the printer alone through most of the seven-hours long print, so I’m close to achieving self-sufficiency. The final step I need to take in order to maintain this level of accuracy and quality is to configure Auto Bed Leveling. I am driven now to do this, and will hopefully post a note on this as soon as I do it (along with how-to’s).
Until then, enjoy the prints.

Leave a comment